Mastering the Curling Stone Delivery: A Step-by-Step Guide
What you need to know about your delivery, before, during and after every stone you throw
Delivering a curling stone is both an art and a science, requiring practice, precision, and focus. Whether you’re a seasoned player or a beginner, understanding the nuances of the delivery process can elevate your game.
Pre-Delivery Preparations
Understand the Shot
Before you even step into the hack, take a moment to comprehend the shot your skip has called. This includes understanding the weight (how hard to throw the stone), the turn (whether to execute an in-turn or out-turn), and the desired outcome. A clear mental picture of the shot is essential for success.
Visualize Success
Mental preparation can significantly enhance your performance. Visualize yourself executing the shot perfectly, hitting the desired weight and line. This technique helps improve focus and boosts confidence.
Gather the Stone
Retrieve the appropriate stone for delivery. Step into the hack by placing the ball of your foot against the back, with your toe pointing toward the skip’s broom. Keep most of your weight on this hack foot for stability.
Setup
Squat or Stand
Depending on your comfort level, you can either squat down while maintaining a straight back or adopt a "hips-up" position. If squatting, ensure your weight is primarily on your hack foot. In the hips-up position, stand with feet as previously described, bending your knees slightly while gripping the rock.
Clean the Stone and Ice
Before delivery, use your broom to clean the running surface of the stone and the ice beneath it. This ensures a smooth glide, crucial for achieving the desired shot.
Position Your Feet
Place your sliding foot flat on the ice, slightly ahead and to the left of your hack foot, ensuring minimal space between them. This positioning sets the foundation for a balanced delivery.
Align Your Body
Align your hack leg's knee, shoulders, and hips squarely with the skip’s broom. Proper alignment is key to executing a straight shot.
Position the Stone
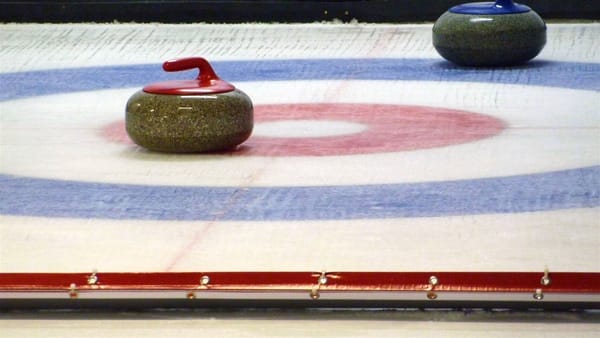
Place the stone directly beneath your throwing shoulder, typically just beside your hack foot. The imaginary line between the stone’s starting point and the skip’s broom is called the line of delivery.
Grip the Stone
Grip the handle of the stone with your fingers positioned underneath. Your middle finger should be centered, with your thumb crossing over near your index finger. Maintain an elevated wrist and cock the handle in the direction opposite your intended turn (left for in-turns, right for out-turns).
The Delivery: A 1-2-3 Cadence
A smooth, fluid delivery is essential, often described using a "1-2-3 cadence."
Forward Press (#1)
Begin by gently pressing the stone forward 2-4 inches. This initial movement sets the tempo and engages your sense of motion.
Drawback and Step (#2)
As you draw the stone back, lift your hips slightly and shift them backward. This action generates power while maintaining the tempo. When your hips reach their highest point, step back onto your sliding foot—this marks the #2 position.
Slide (#3)
Now, it’s time to unleash your power. Move the stone forward while delaying the movement of your sliding foot. This “Foot Delay” allows gravity to assist you as you drop into your sliding position. Quickly bring your sliding foot under your chest, transferring your weight fully to it. Angle your sliding foot slightly outward if possible, positioning your heel beneath your sternum.
Release
As you slide, keep your throwing arm slightly flexed and the handle cocked until just before your release point, ideally near the hog line . Aim for a smooth, controlled motion as you rotate the stone and extend your arm through the base of the skip’s broom. Avoid any upward movement of your arm to ensure a clean release.
Apply Rotation
Rotation is crucial for affecting the stone’s speed and curl. Use your thumb and two fingers to apply pressure on opposite sides of the stone's center. For in-turns, apply pressure with your thumb and ring finger; for out-turns, use your index and ring fingers. Aim for 3-4 rotations during a draw shot.
Follow-Through and Assessment
Maintain Your Slide
After releasing the stone, remain in your sliding position for a few seconds. This helps maintain balance and allows you to observe the stone’s trajectory.
Assess Your Shot
Finally, critically evaluate your delivery. Did you hit the broom with the correct weight and line? If not, analyze the reasons and make adjustments for your next shot. Continuous assessment and refinement are key to developing your skills.
Conclusion
Delivering a curling stone involves a combination of technique, mental preparation, and practice. By following these steps and developing a consistent delivery that feels comfortable for you, you can enhance your performance on the ice. Remember, every curler has a unique style, so don’t hesitate to experiment with different techniques to find what works best for you. Happy curling!